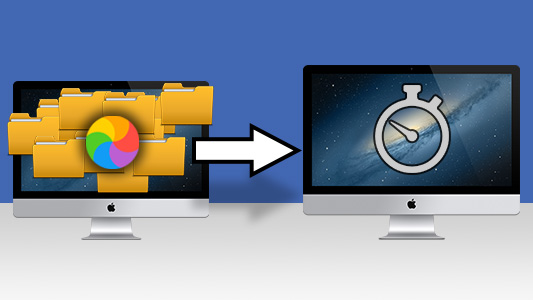
That spinning wheel with the rainbow on it. The cursor that stutters. Apps that take forever to open. If you’re staring at your screen and saying, “Why is my MacBook so slow?” you’ve come to the right place. It’s a frustrating experience that can stop you from being productive and creative. Any machine can slow down, whether it’s a brand-new MacBook Pro with the latest M-series chip or an older MacBook Air that you trust.
The good news? You usually don’t need to rush out and buy a new computer. A slow MacBook is often just a sign that it needs some help—a sign that it needs some work. You could compare it to a car: even the fastest ones need regular maintenance to stay in top shape. Your Mac is the same way.
In this full guide, we’ll go into great detail about the most common reasons why a Mac runs slowly. We’ll explain the technical terms and give you a useful, step-by-step plan to figure out what’s wrong and get your MacBook back to its fast, smooth self. Let’s get that snap back in your system.
Your startup disk is running out of space.
Think about how hard it would be to work in a small, messy closet. You can’t move, you can’t find your tools, and it takes ten times longer than it should to do anything. When your MacBook’s startup disk (the internal hard drive or SSD where macOS lives) is almost full, it acts just like this.
To work well, macOS needs a certain amount of free space. This space is used for temporary files, caches, virtual memory (swap files), and just giving programs some space to breathe. Your computer will slow down a lot when that space is gone. You should always try to keep at least 15–20% of your total storage space free. If you keep getting warnings that your startup disk is almost full, this is the first and most important thing you need to do.
How to Look at and Clean Your Storage
Apple has great built-in tools to help with this, thank goodness.
Check Your Storage: Open the Apple menu and choose System Settings > General > Storage.
Wait for Calculation: Let your MacBook take a minute or two to figure out how much space you have used. It will show you a color-coded bar that tells you what’s taking up space, like apps, documents, photos, system data, and so on.
Follow the Suggestions: This window will show you a few suggestions from macOS. These are the things that are easy to get:
Store in iCloud: This moves your Photos, Messages, Desktop, and Documents folders to iCloud, which frees up space on your computer. It works really well if you have a good iCloud+ plan.
Optimize Storage: This feature automatically deletes movies and TV shows that you’ve already watched from the Apple TV app and keeps only the most recent email attachments on your Mac.
Automatically Empty Trash: This is a simple step that people often forget to do. This will delete items that have been in the Trash for more than 30 days on its own.
Steps to Take for a Deep Clean
It’s time to get to work, even though the suggestions are automated.
Hunt Down Large Files: In the Storage menu, scroll down and look for categories like “Documents” or “Large Files.” Click the little ‘i’ icon to see a list of your biggest space-hoggers. You might be surprised to find old .dmg (disk image) files from apps you installed, huge ZIP files you forgot about, or old video projects. Get rid of things you don’t need anymore.
Get Rid of the Stuff in Your Downloads Folder: The Downloads folder is like a junk drawer for your computer. Sort it by “Date Added” and get rid of anything old that you don’t need. You can find a more in-depth guide on file management in our post titled “How to Organize Your Mac’s Files for Maximum Productivity” (https://www.google.com/search?q=/blog/organize-mac-files).
Uninstall Unused Applications: When you drag an app to the Trash, it usually leaves behind preference files and other data. Use an uninstaller app like AppCleaner (it’s free!) to get rid of it more cleanly. Look through your Applications folder and be honest about what you really use. That app you got three years ago to do one thing? It needs to leave now.
Clear Caches: Your MacBook keeps cached files to speed things up, but over time these files can get too big and broken, which has the opposite effect. You can clear them by hand, but it’s dangerous if you don’t know what you’re doing. Using a Mac cleaning app that you trust is a safer bet. But a simple restart often safely clears a lot of temporary caches.
The RAM Hog: Too Many Open Doors
Random Access Memory (RAM) is your MacBook’s short-term memory, while storage is its long-term memory (the filing cabinet). It’s where your computer keeps all the apps and files it’s currently using. You use more of this workbench space when you have more apps and browser tabs open.
When your Mac runs out of physical RAM, it starts using your startup disk as “virtual memory.” This process, called “swapping,” can make your whole system feel like it’s wading through molasses because even the fastest SSD is much slower than RAM. This is a big reason why your MacBook so slow feels like it’s under a lot of stress.
How to Use Activity Monitor to Find Memory Hogs
Activity Monitor is a built-in tool that can help you figure out what’s wrong with your RAM.
You can find “Activity Monitor” in “Applications > Utilities,” or you can just use Spotlight (Cmd + Space) and type “Activity Monitor.”
Go to the Memory Tab: At the top, click on the “Memory” tab. You will see a list of all the processes that are running on your Mac.
Sort by “Memory”: Click on the column header to sort the list by how much RAM is being used. The people who do the worst things will be at the top.
Look at the Results: If you see a process called “kernel_task” using a lot of memory, don’t worry; this is a main part of macOS. But look for certain apps. Does Google Chrome use a lot of RAM? Is a photo editing app you left open in the background still using memory?
Useful Tips for Managing RAM
Quit, Don’t Just Close: When you click the red “x” on a Mac app window, you usually only close the window. The app itself keeps running in the background. If you want to completely quit an app and free up its RAM, either right-click its icon in the Dock and choose “Quit,” or press Cmd + Q while the app is open.
Be a Browser Tab Minimalist: Each tab in your browser is a separate process that uses RAM. If you have more than 50 tabs open, you’re putting a lot of stress on your system. Instead of keeping all of your tabs open, use your browser’s bookmarking feature or a session manager extension to save them for later.
Restart Your MacBook: The oldest trick in the book is still one of the best. When you restart your MacBook, it clears out the RAM and stops background processes that may have built up over days or weeks of being on. Try to do this at least once every few days. Apple’s own support page has great basic troubleshooting advice if you want to learn more about this.
Software that is no longer supported and macOS: Falling behind the times
If you have an old version of macOS or old apps, they can slow down your computer a lot. Updates don’t just add new features; they also fix bugs, improve performance, and patch security holes. If you don’t update an app to the latest version of macOS, it might not work as well as it should, which can make it slow and inefficient.
Apple is also always working to improve macOS so that it works better on their hardware. You’re missing out on years of improvements if you’re a few versions behind. If your “MacBook so slow” problems started after you hadn’t updated in a while, this is probably the cause.
The Easy Way to Update Everything
To update macOS, go to System Settings > General > Software Update. Your Mac should look for updates. Put it in if you can find one. These downloads can be big, so make sure your MacBook is plugged in and you have a stable Wi-Fi connection.
Update Your Apps: Launch the App Store app. In the sidebar, click on the “Updates” section. To update all of your App Store apps, click “Update All.”
Update Third-Party Apps: If you downloaded an app from somewhere other than the App Store, like Google Chrome or Microsoft Office, you’ll usually have to update it from inside the app itself. In the app’s main menu, look for a “Check for Updates…” option. For example, in Chrome, it’s under the “Chrome” menu.
One of the easiest and most important things you can do to keep your Mac running well is to stay up to date. Check out our comparison of macOS Sequoia vs. macOS Sonoma for a more in-depth look at the benefits of the newest OS.
Startup Overload: Too Many Cooks in the Kitchen at Launch
Is it true that your MacBook takes a long time to start up after you log in? There are probably too many “Login Items” or “Launch Agents.” These are apps and helper tools that start up automatically when you turn on your Mac.
Some apps are needed, like a mouse driver or a cloud sync client like Dropbox. However, many apps add themselves to this list without you even knowing it. Each one makes the boot time longer and uses system resources right away, which is why you might feel like your MacBook is so slow at first.
How to Cut Down on Your Login Items
In newer versions of macOS, Apple has made this process easier by putting it all in one place.
- Navigate to Login Items: Click on System Settings > General > Login Items.
- Look over the Lists: There are two main parts to this:
Open at Login: These are the most obvious ones—apps that open completely and show up in your Dock when you log in. Choose an app from this list that you don’t need right away when you start up your computer, and then click the minus (‘-‘) button to get rid of it.
Allow in the Background: This list is more important. It has background processes, updaters, and other tools that help. Look over this list very closely. Do you know who made it? Do you still use the main app that it belongs to? Turn off anything you don’t know what it is or don’t need anymore. For instance, if you uninstalled Adobe Photoshop but still see a “Adobe Creative Cloud” background item, you can safely turn it off.
Be careful here. If you’re not sure what something is, don’t turn it off. You can find out what the process does by doing a quick Google search for its name. Getting your login items under control can speed up your computer’s startup time by a lot.
Personalization and Visual Effects: Is Your Mac Working Too Hard to Look Good?
The look of macOS is great. The experience includes its clear menus, smooth animations, and changing wallpaper. These visual effects, also called “eye candy,” do need processing power, though. On older Macs or Macs with built-in graphics, these effects can sometimes use up just enough resources to make the system feel less responsive.
If your MacBook is so slow that moving windows around feels choppy, you can make it run better by turning down some of the visual effects.
How to Make the Pictures Less Bright
Lower Transparency: Click on System Settings > Accessibility > Display. Check the box that says “Reduce transparency.” This will change the see-through sidebars and menus to a solid, opaque gray, which uses less graphics.
Minimize Motion: In the same Accessibility > Display panel, check the box next to “Reduce motion.” This will turn off effects like the “genie” effect when you minimize windows and the smooth scrolling in some views, and replace them with a simple fade.
Use a Static Wallpaper: A simple static image uses fewer resources than an animated or “dynamic” wallpaper that changes throughout the day. Select a still image by going to System Settings > Wallpaper.
Browser Blues: Add-ons and Mess
The web browser is the app we use the most on our MacBook. If your Mac is slow mostly when you’re browsing the web, the problem might be with your browser, not the whole system.
Even though Google Chrome is powerful, it is known to use a lot of resources. But no matter what browser you use—Chrome, Safari, or Firefox—too many extensions and a full cache/history can slow it down.
H3: Tips for Making Your Web Browser Faster
Do an Extension Audit: Browser extensions are small programs that add features, but they also use RAM and CPU cycles. Look through the list of extensions in your browser and get rid of the ones you don’t need. Turn off or delete any extensions that you don’t use every day. They can often fight with each other or lose memory.
Clear Browser Data: Your browser collects a lot of website data, cookies, and history over time. The cache is supposed to make Browse faster, but a broken or too big cache can make it slower. Clear your Browse data every so often. You can find this in Settings > Privacy and Security in most browsers. Select “All time” to clear the cache, cookies, and history.
Try a Different Browser: If you use Chrome a lot and your MacBook is still slow, try using Safari for a week. Safari works very well with macOS and uses less RAM and power than Chrome in general. You might be shocked at how different the performance is.
The Secret Danger: Malware and Adware
The MacBook platform is much safer from traditional viruses than Windows, but it is still not safe from malware. “Adware” or “PUPs” (Potentially Unwanted Programs) are more common on macOS. These often come with free software that you download from sites that aren’t safe.
This kind of malware can run hidden processes in the background, keep track of what you do, add ads to web pages, and take over your browser’s search engine. All of this work uses up CPU and RAM, which makes things slow down a lot.
How to Find and Get Rid of Malware
A dedicated scanner is the best way to find malware if you think you have it.
Get a Trusted Scanner: Don’t just search for “free Mac antivirus” on Google; this could lead you to more harmful software. Malwarebytes for Mac is a tool that many people trust and recommend. You can scan and get rid of threats for free.
Do a Full Scan: Install Malwarebytes and scan your whole system. It will look for known malware and adware and put anything it finds in quarantine.
Get Rid of the Threats: Follow the instructions on the screen to get rid of any threats that were found.
Download Safely: The best way to avoid problems is to avoid them. You should only get software from the official Mac App Store or the developer’s own website. Be careful with sites that let you download a lot of things at once.
More advanced steps for the determined user
If your MacBook is still very slow after trying all of the above, there are a few more advanced things you can try.
Setting the SMC and PRAM/NVRAM back to factory settings
SMC (System Management Controller): This controls things like power management, fans, and status lights at a low level. Resetting it can fix a lot of weird problems, like when the fans don’t spin up right to cool the CPU, which can make it run slower. The steps are different for each model of MacBook (Intel vs. Apple Silicon). MacWorld has a great guide. A quick restart is often all it takes for Apple Silicon Macs.
PRAM/NVRAM (Parameter RAM/Non-Volatile RAM): This keeps track of things like the screen resolution, the startup disk, and the volume of the speakers. Resetting it can fix settings that are broken and may be causing problems, but it is less likely to slow down. On Intel Macs, the process usually starts by holding down the keys Option + Cmd + P + R while the computer boots up.
The “Nuclear Option”: A Clean Install of macOS
This is the last thing you should do to fix the problem. It means wiping your startup disk clean and putting on a new, factory-default copy of macOS. This gets rid of any software-related problem, from corrupted system files to malware that has been around for a long time.
This is a big job. This process will delete everything, so you must have a full backup of your data (preferably with Time Machine) before you start. You would have to reinstall your apps and copy your user data back from your backup after the clean install. This makes sure you don’t bring back the files that were slowing you down. To see how to do it step by step, read our Ultimate Guide to a Clean macOS Install.
Last Thoughts: Getting Your MacBook’s Speed Back
Having a slow MacBook is very annoying. The most important thing is to deal with the problem in a methodical way. Most of the time, the answer to “Why is my MacBook so slow?” isn’t one big problem, but a bunch of little ones, like a hard drive that’s full, too many apps running in the background, and software that needs to be updated.
You can find and fix the bottlenecks one at a time by following the steps in this guide, starting with the easiest and most important ones, like cleaning up your storage and managing your login items. Add these checks to your regular digital hygiene. Like you clean up your physical workspace, you should also clean up your digital workspace once a month for 15 minutes.
Your MacBook is a powerful tool that was made to last and work well. If you take care of it, it will serve you well for years to come without any lag or slowdowns. Now, go ahead and give your Mac the tune-up it needs!
https://bigezwehotv.rw/trends/