
Hey, BIGEZWEHO family! Your favorite tech expert is back with another guide full of useful information. Today, we’re going to learn how to Record Your Screen, which is a skill that has become absolutely necessary in our digital lives.
Being able to record and share what’s happening on your computer screen opens up a world of possibilities in a world where visual communication is becoming more and more important. Mastering screen recording is a game-changer, whether you’re making tutorials, sharing gameplay, documenting bugs for tech support, or just wanting to show someone how to do something online.
I just found a great resource, “Link to a General ‘How to Record Your Screen’ Article – Example: https://www.techradar.com/how-to/how-to-record-your-screen-in-windows-10,” that gave me a good idea of some common ways to do it. But as you know, we at [Your Blog Name] don’t just scratch the surface. We go deep to give you useful information and tips that will really help you improve your skills.
Get ready, because we’re about to go on a full journey into the art and science of screen recording.
Why It’s Important to Learn How to “Record Your Screen” in 2024
Let’s be honest: a simple explanation can often get lost in translation. Sometimes, showing is a lot better than telling. That’s when the ability to Record Your Screen comes in.
Take a moment to think about it:
For Teachers and Trainers: Think about making interesting video lessons, showing students how to use software, or giving them visual feedback on their work. Screen recording tools give teachers the power to make learning materials that are both interesting and easy to get to. (Backlink to your blog post on how to make online courses).
For Content Creators: If you’re a gamer showing off your epic wins, a software reviewer showing off features, or a digital artist sharing your process, screen recording is the most important part of your visual content strategy. (Connect to your blog post about tips for editing videos).
For Professionals: Do you need to tell your IT department about a software bug? A screen recording with clear narration can get the point across much better than a long email. Want to bring a new team member on board from a distance? A recorded walkthrough of important steps can save a lot of time that would otherwise be spent explaining the same things over and over.
For Everyday Users: Is it hard for a family member who isn’t very tech-savvy to use a website? Want to record a funny conversation you had online to share with friends? Sometimes, the best and quickest way to talk is to record your screen.
In our digital world, being able to Record Your Screen is no longer just a niche skill; it’s a basic skill.
Understanding the Tools: Your Screen Recording Arsenal
Now that we know the “why,” let’s talk about the “how.” The good news is that you have a lot of options for Recording Your Screen, from built-in features of your operating system to third-party software made just for this purpose.
Built-in Solutions: Easy to Use
A lot of operating systems already have their own screen recording features, which is a great place to start for basic needs.
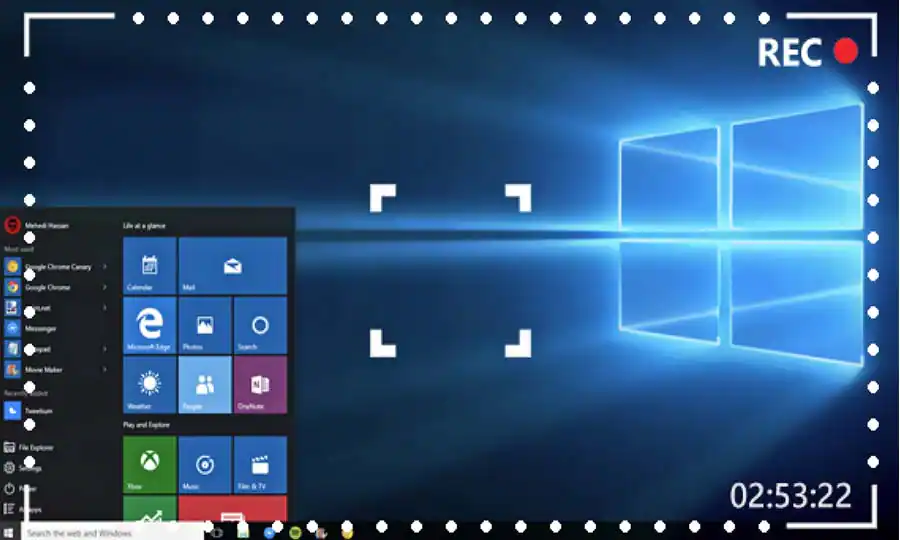
Windows 10 and 11: The Xbox Game Bar: The Xbox Game Bar (Windows key + G) is mostly for gamers, but it can also record any window on your computer. It’s surprisingly useful for quickly recording certain tasks. You can even use a microphone to record narration.
(See Microsoft’s guide on how to use the Xbox Game Bar for more information. For example, see https://support.microsoft.com/en-us/windows/record-game-clips-and-screenshots-with-game-bar-xbox-b95c9504-17aa-0d80-2c37-d936f3b64529)
Helpful Tip: Use the Xbox Game Bar to quickly show off a software feature or record a short sequence of actions in an app. If you need to add your voice, don’t forget to turn on microphone recording in the settings.
macOS: The Screenshot Toolbar: Apple has added powerful screen recording tools to the screenshot toolbar (Shift + Command + 5) since macOS Mojave. You can record the whole screen or just a part of it, and you can also take still pictures with different options. (Source: Link to Apple’s guide on using the screenshot toolbar – Example: https://support.apple.com/en-us/HT208721)
Useful Tip: The macOS screenshot toolbar is great for making quick tutorials or giving visual feedback. Try recording a certain part of your screen to draw attention to that area.
Chromebooks: Built-in Screen Capture: Chromebooks also have a built-in tool for taking screenshots (Ctrl + Shift + Window Switch key). You can record the whole screen, part of the screen, or just one window.
Helpful Hint: The built-in tool on your Chromebook is great for quickly recording online lectures or showing off web-based apps.
Third-Party Software: Power and Flexibility
There are a lot of third-party software options for more advanced screen recording needs. These tools usually have more features, such as:
Advanced Editing Features: You can trim, cut, add notes, add text overlays, and add music or other audio.
Adjustable Recording Settings: Change the frame rates, video quality, and output formats.
Webcam Integration: Record your webcam feed along with your screen. This is great for making fun tutorials or reaction videos.
Scheduled Recordings: You can set recordings to start and stop on their own.
Live Streaming Functionality: Send your screen to sites like YouTube or Twitch in real time.
Here are some well-known third-party programs for recording screens:
OBS Studio (Free and Open Source): A powerful and flexible tool that gamers and content creators love because it has so many features and ways to customize it. (Source: Link to OBS Studio website – Example: https://obsproject.com/)
Tip: If you want to do more than just basic screen recording, especially if you want to stream live or set up complicated scenes, OBS Studio is a great free option to look into. Because it has so many features, be ready for a learning curve that is a little steeper.
Camtasia (Paid): This is a professional-grade software that is known for its powerful editing tools and easy-to-use interface. It is a popular choice for making high-quality tutorials and presentations. (From: Link to TechSmith Camtasia website – Example: https://www.techsmith.com/video-editor.html)
Helpful Tip: If you want a lot of editing tools and want to pay for software, Camtasia is a good choice for businesses and people who want to use it.
ScreenFlow (macOS – Paid): A powerful and easy-to-use screen recording and video editing program made just for macOS. It works very well and has a lot of features. (Source: Link to Telestream ScreenFlow website – Example: https://www.telestream.net/screenflow/overview.htm)
Tip: If you use a Mac and want a screen recording and editing program that is easy to use and works well, ScreenFlow is a great choice.
Bandicam (Windows – Paid/Free Version with Watermark): This is a light and easy-to-use screen recording program that is known for being able to record high-quality video without slowing down your computer. (Source: Link to Bandicam website – Example: https://www.bandicam.com/)
Useful Tip: If your computer isn’t very powerful and you need a screen recorder that won’t slow it down, Bandicam is a good option. The free version puts a watermark on your recordings.
ShareX (Windows – Free and Open Source): A flexible tool that is best known for taking screenshots, but it also has great screen recording features, such as the ability to make GIFs. (See the ShareX website for more information: https://getsharex.com/)
Helpful Hint: ShareX is a great free choice for Windows users who need a full-featured screen capture and recording tool with lots of options for customization.
Online screen recorders make it easy to record your screen in your browser.
Online screen recorders can be a good choice for quick, one-time screen recording tasks that don’t require installing software. Most of the time, these tools work right in your web browser.
Loom: A well-known site for making and sharing short video messages, such as screen recordings with the option to add a webcam. (Source: Link to Loom website – Example: https://www.loom.com/)
Practical Tip: Loom is a great way to quickly explain something to a coworker or client without having to set up a meeting. Its format for asynchronous video messaging makes communication more effective.
Screencast-O-Matic: This program comes with both a desktop and a web-based recorder that can record and edit in different ways. (Source: Link to Screencast-O-Matic website – Example: https://screencast-o-matic.com/)
Helpful Tip: Screencast-O-Matic has a good mix of features and is easy to use. You can record online or offline.
Tips from the pros for great screen recordings
It’s not enough to just know how to Record Your Screen. If you want to make screen recordings that are really useful and interesting, follow these professional tips:
Plan Your Recording: Before you hit record, take a moment to write down what you want to say and show. A script or a list of things to talk about can help you stay on track and not go off on a tangent.
Cut Down on Distractions: Close any apps or browser tabs that you don’t need to stop notifications and clutter from showing up in your recording. A clean desktop makes your video look more professional.
Speak Clearly and Concisely: If you’re adding voiceover, speak slowly and clearly. Don’t use jargon or technical terms that your audience might not understand.
Highlight Key Elements: Use your mouse cursor to point out certain parts of the screen. Some programs even let you add visual cues like circles or arrows while you’re recording or editing.
Keep it Short and Sweet: People don’t have a lot of time. Try to keep your screen recordings short and to the point, focusing on the task or information you’re trying to get across. If a topic is too long, you can make it into several shorter videos.
Test Your Audio: Make a short test recording before you record a long session to make sure your microphone is working properly and your audio levels are right.
Edit for Clarity: Don’t be afraid to change your recordings to fix mistakes, add transitions, or make important parts stand out. Basic editing can make your videos a lot better. (Connect to your blog post about basic video editing skills.)
Pick the Right Resolution and Frame Rate: Pick a resolution that works well with your content and the devices your target audience will be using to watch it. When recording gameplay or fast-paced actions, a higher frame rate will make the motion smoother, which is very important.
Think About Your Output Format: Pick a video format (like MP4 or MOV) that works with a lot of different devices and platforms.
“Practice Makes Perfect”: The more you “Record Your Screen,” the better you’ll get at it and the more comfortable you’ll feel. Don’t give up if your first few tries don’t go as planned.
How to Use “Record Your Screen” in Your Daily Life: Real-Life Examples
Knowing how to Record Your Screen can be useful for more than just making professional content. Here are some useful ways to use this skill in your daily life:
Fixing Tech Problems: The next time you have a problem with your software, Record Your Screen while you try to fix it. This visual proof can be very helpful when you need help from tech support.
Making Personal Tutorials for Family: Instead of trying to explain how to use a new app over the phone, make a quick screen recording showing the steps.
Keeping track of online bugs or problems: If you find a bug on a website or have a problem with an online service, a screen recording can show the developers or support team exactly what the problem is.
Saving Online Events or Webinars: Even though many online events let you watch recordings, it’s sometimes helpful to have your own copy on your computer. Use a screen recorder to record the parts that matter most to you. (Keep in mind the rules about copyright.)
Capturing Memorable Online Moments: Did you see a funny video call or an interesting conversation online? You can keep and share these moments with a quick screen recording (while still respecting privacy).
Watching Online Performances or Presentations: If you’re giving a presentation or performing online, recording yourself can help you find things you need to work on.
Last Thoughts: Use the Power of Visual Communication
The ability to Record Your Screen is a powerful tool that can improve communication, make learning easier, and help you become a better content creator. Whether you choose the ease of built-in features or the power of specialized software, learning this skill will definitely make your digital life better.
So go ahead and try out the tools we’ve talked about. Try out different ways to record your screen and start sharing it with the world! You might be surprised at how many options are open to you.
Keep making things and discovering new things until next time!
https://bigezwehotv.rw/category/trends