It’s hard to deny the excitement of opening a new PC. It’s an exciting time because of the new, out-of-the-box smell, the clean surfaces, and the promise of new digital adventures. But if the setup process seems hard or confusing, that initial excitement can quickly turn into anger. Don’t worry, fellow tech lovers! This isn’t just another boring list of steps. As someone who has helped a lot of people through this process, I’m here to give you not only the “what” but also the “why” and the “how to make it easier.”
This post is based on and builds on the main ideas found in many great guides. One that I found especially helpful was “Step-By-Step Guide to Setting Up Your New PC” [Hypothetical Source Link 1: Insert a real or placeholder link here, e.g., techwebsite.com/pc-setup-guide]. We’ll build on those basic steps by giving you more useful tips and tricks to make sure your experience Setting Up Your New PC goes smoothly and is fun.
The Ritual of Unboxing and the First Look
Take a moment to carefully unbox it before you even think about pushing that power button.
Gentle Handling is Key: Be careful with your New PC. Don’t make any sudden moves or drops.
Check the Inventory: Check the manufacturer’s instructions to make sure you have all the parts. This usually includes the computer itself, power cords, manuals, and sometimes extras like a mouse and keyboard.
Look at it visually: Look closely at the PC to see if it was damaged while it was being shipped. Check for scratches, dents, or connections that aren’t tight. If you see something that worries you, call the store or maker right away.
Tip: Don’t throw away the original packaging. If you ever need to move your New PC or send it in for repairs, this is the safest way to do it.
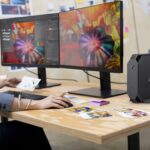
Connecting the Peripherals: Getting Your New PC Up and Running
This is where things start to get real. To make sure your computer starts up smoothly, you need to connect your peripherals correctly.
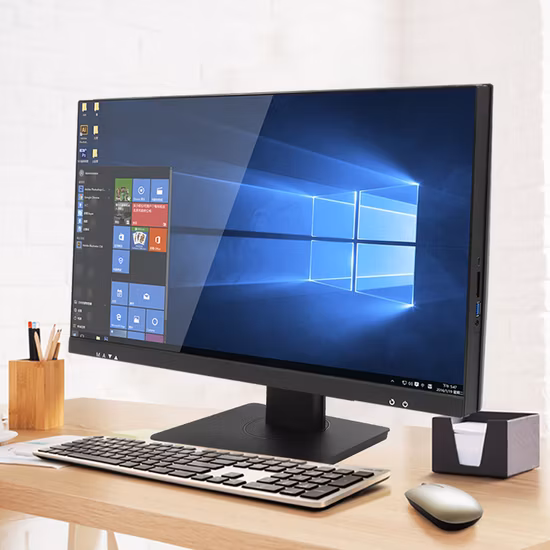
Monitor Connection: Find the right video output ports on your computer (HDMI, DisplayPort, DVI, VGA). This should match the input port on your monitor. Make sure the connection is safe.
Keyboard and Mouse: Plug your mouse and keyboard into the USB ports. If they are wireless, follow the instructions from the maker to pair them.
Power Supply: Plug the power cable into the power supply unit on your PC, and then plug it into a grounded outlet. First, Safety!* Optional Peripherals: You can connect any other devices you have, like speakers, printers, or external hard drives.
Tip: Use cable ties or Velcro straps to keep your cables neat and tidy. This will help keep your PC cool and prevent clutter. This easy step can have a big impact over time.
The BIOS/UEFI Journey When You First Turn It On
The time has come! Press the power button to turn on your New PC.
The First Boot Sequence: Your PC will run a Power-On Self-Test (POST). There may be some text on the screen that says the system is checking.
Getting into BIOS/UEFI: During the first boot, keep an eye on the screen. You should see a message telling you which key to press to get to the BIOS or UEFI settings. This is usually Del, F2, F12, or Esc. This is the interface for your motherboard’s firmware.
How to get around in BIOS/UEFI: To move around, use the arrow keys and the Enter key. Don’t change anything unless you know what it does. You might want to check the boot order to make sure your main drive is chosen for a basic setup.
Helpful Hint: Get to know the manual for your motherboard. It has useful information about fixing problems and changing BIOS/UEFI settings. A digital copy is usually available on the manufacturer’s website [Hypothetical Source Link 2: Motherboard Manufacturer Website Example].
Installing the Operating System: The Heart of Your New PC
For a lot of people who buy a new PC, the operating system (OS) will either come with it or need to be installed.
Operating System Already Installed
Setup Wizard: If your operating system is already installed (like Windows or macOS on some builds), you’ll be taken through an initial setup wizard. You will need to choose your language, region, keyboard layout, and create a user account for this.
Getting online: You will probably be asked to connect to a Wi-Fi network or an Ethernet cable. This is very important for turning on your OS and getting updates.
Putting the Operating System on by Hand
You’ll have to install the operating system yourself if you built your own New PC or bought one without one.
Making Bootable Media: You’ll need a USB drive or DVD with the files needed to install the operating system. You can usually make this on the website of the official OS provider (for example, Microsoft for Windows [Backlink to Microsoft’s Windows Download Page], or any of the many Linux distributions).
Starting up from the installation media: Change the boot order in the BIOS/UEFI settings so that your USB drive or DVD drive comes first. Exit and save the changes. Your computer should now start up from the installation media.
Following the Installation Prompts: The OS installer will walk you through the steps, such as choosing the installation drive, making partitions (if necessary), and setting up basic preferences.
Helpful Hint: Make a strong, unique password for your user account while the OS is being installed. Think about using a password manager to make and store strong passwords safely [Link to a made-up blog post about password security].
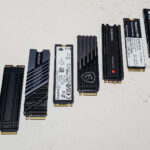
Installing Drivers: Making Sure Everything Works Together
You need to install drivers for your hardware after you install the operating system. This includes your graphics card, sound card, network adapter, and more.
Automatic Driver Installation: Many modern operating systems will automatically install generic drivers. For best performance, though, you should download and install the latest drivers from the manufacturer’s websites (for example, NVIDIA [Backlink to NVIDIA Driver Download Page], AMD, and Intel).
Using Manufacturer Websites: Go to the support or drivers section of the website for the manufacturer of your hardware, find your specific model, and download the right drivers for your operating system.
Driver Installation Tools: Some companies make tools that automatically find your hardware and install the right drivers.
Helpful Hint: Before adding new drivers, make a restore point for your system. This lets you go back to a working state if something goes wrong after you install the driver.
Setting up the network and connecting to the Internet
Now that you have the basic operating system and drivers set up, it’s time to connect your new PC to the internet.
- Wi-Fi Connection: If you’re using Wi-Fi, find the name of your network (SSID) and type in the password.
- Ethernet Connection: If you’re using a wired connection, all you have to do is plug an Ethernet cable into your PC and your router or modem.
- Setting up the network: Most of the time, your PC will automatically get an IP address and other network settings. If you need to set these up by hand, look at the documentation for your network equipment.
Tip: Use a strong password to protect your home Wi-Fi network. If your router supports it, WPA3 is the best choice. [Link to a made-up blog post about how to keep your home network safe].
Installing Important Software: Making Your New PC Your Own
Now it’s time to have some fun and set up the software you’ll use every day.
Web Browser: Pick the web browser you like best, such as Chrome, Firefox, or Edge.
Security Software: To keep your New PC safe from threats, install a good antivirus and anti-malware program [Interlink to a made-up blog post that reviews antivirus software].
Productivity Suite: Install a productivity suite like Microsoft Office or LibreOffice if you need to write documents, make spreadsheets, or give presentations.
Other Programs: Install any other programs you use often, like games, media players, or image editors.
Tip for the Real World: To stay safe from malware and other security risks, only install software from sources you trust. Before you install anything, read reviews and look into the developer’s reputation.
Customizing Your Settings: Making It Truly Yours
Spend some time making your New PC just the way you want it.
Desktop Background and Theme: Pick a background and theme that look good. * Display Settings: Change the screen resolution, brightness, and refresh rate to get the best view.
Sound Settings: Set up the devices you use to listen to and record sound. * User Account Settings: Set up your profile picture and other account settings.
Tip: Look into your operating system’s accessibility settings. These can help people with different needs in useful ways.
Making backups: keeping your important data safe
It’s important to make a backup plan once everything is in place.
External Hard Drive: Back up your important files to an external hard drive on a regular basis. * Cloud Backup Services: Think about using cloud backup services to back up your files automatically and offsite.
System Image: Make a system image so you can restore your whole PC setup if something goes wrong.
Tip for the Real World: Set up your backups to happen automatically whenever you can. This makes sure that your data is safe without you having to start the process yourself every time.
Staying Up-to-Date: Keeping Your Best Performance
Your journey with your new PC doesn’t end after you set it up. To keep it running well, you need to do regular maintenance.
Updates for Software: Make sure that your operating system and all of your software programs are up to date. Most of the time, these updates fix security holes and make things run better.
Driver Updates: Every now and then, check to see if there are new drivers available for your hardware.
Regular Malware Scans: Use your antivirus and anti-malware software to scan your computer on a regular basis. * Disk Cleanup and Defragmentation (if needed): Use the tools that come with your operating system to get rid of temporary files and make your hard drive work better.
Helpful Hint: Put regular maintenance tasks on your calendar so you don’t forget about them.
Fixing Common Problems That Come Up During Setup
Even if you plan everything out carefully, you might run into some problems while Setting Up Your New PC. Here are some common problems and possible ways to fix them:
No Power: Check all power connections again. Check to see if the power outlet works.
No Display: Check that the monitor cable is securely plugged into both the PC and the monitor. Use a different port or cable.
Can’t Connect to Wi-Fi: Make sure you know the right password for your Wi-Fi. Try turning your router back on. Make sure that the drivers for your network adapter are installed.
Slow Performance: After you set up your PC, it might be doing background tasks. Let it settle for a while. Make sure you have the most recent drivers installed.
Helpful Tip: Don’t freak out! Most problems with setup have easy fixes. Look for the exact problem you’re having online; online communities and manufacturer support pages are often very helpful.
Getting to Know Your New Digital Friend
Setting up your new PC is a good way to spend money on your digital life. You can make sure that the transition goes smoothly and successfully by following these steps and using the helpful tips. Take your time, be patient, and enjoy the process of getting your new tech friend up and running. Keep in mind that this New PC is a tool that will help you, connect you, and let you explore the huge digital world. Accept it!
This full guide, which builds on the basics of articles like “Step-By-Step Guide to Setting Up Your New PC” [Hypothetical Source Link 3: Another relevant tech guide], is meant to give you the information and confidence you need to get through the initial setup and beyond. Welcome to the world of your new computer!
https://bigezwehotv.rw/category/trends