Do you ever think your Mac is moving too slowly? You might have found some old advice on the internet that says you need to “defragment” your Mac hard drive. It sounds important, technical, and like the secret to getting speeds that are lightning fast. Defragmenting was a common way to fix a slow Windows PC for years. But your sleek, modern Mac is a whole different story.
The short answer is that you probably don’t need to defragment the internal hard drive on your Mac. In fact, trying to do this on a modern Mac can be completely useless at best and even harmful at worst.
So, why does this myth keep going around? What else can you do to keep your Mac running at its best if defragmenting doesn’t work? In this ultimate guide, we’ll bust the myth about defragmentation, go into detail about the technology that powers your Mac hard drive, and give you modern, useful ways to really speed up your computer. Let’s stop talking about old advice and start talking about what really works in 2025.
What is defragmentation, anyway? A Trip Down Memory Lane
To figure out why we don’t defragment Macs anymore, we need to know what defragmentation is and why it was a thing in the first place. Let’s go back to the time when computers were big, loud, and used traditional hard disk drives (HDDs).
A traditional hard drive is like a big record player. It has a spinning platter (the record) and a mechanical arm with a read/write head that moves back and forth to get to the data.
When you save a file on your computer, like a document or an application, it writes that data to the platter in empty blocks. When the drive is new, it first finds a nice, big, empty space that is next to another empty space and puts the whole file there. Putting a book on an empty shelf is like putting all the pages together.
Things go wrong when you start making, changing, and deleting files. Think about deleting a small file. This makes a small empty space on the platter. Now, you should try to save a new file that is bigger. The drive might not be able to find a single empty space that is big enough for it. So, it does the next best thing: it breaks the file into smaller pieces, or “fragments,” and scatters them across all the little empty gaps it can find. Your file is saved, but it’s now like a book with pages missing and stored in different parts of a library.
This is called “fragmentation.”
When you want to open that broken file, the HDD’s mechanical arm has to physically race back and forth across the spinning platter to find and put together all the pieces that are all over the place. This movement in the real world takes time, which causes delays and makes your computer feel slow.
Defragmentation is the process of getting rid of this mess. A defrag tool is like a very careful librarian. It painstakingly finds all the pieces of each file and moves them around until they are all in one block. It also puts all the free space together into one big piece. What happened? The read/write head doesn’t have to work as hard, files open faster, and the system feels faster. For a long time, this was an important part of keeping any computer with an HDD running.
The Modern Mac Hard Drive: A Whole New Game
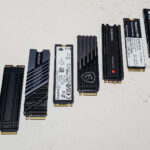
So, if defragmentation was so important, why isn’t it needed on Macs anymore? The answer is a big change in technology. Apple started moving away from traditional HDDs and toward a new kind of storage called the Solid-State Drive (SSD) around 2010. Almost all new Macs, from the MacBook Air to the Mac Pro, now come with an SSD.
Welcome to the SSD Age
An SSD is not at all like a record player. It’s more like a huge grid of flash memory chips, like the memory in your smartphone or a USB flash drive. There are no moving parts, like spinning platters or mechanical arms. You can get to the data electronically.
Remember the library example we used? The librarian (the read/write head) has to run between aisles to pick up pages that are spread out when there is an HDD. The librarian has a teleporter with an SSD. They can get to any page in the library in the same amount of time, no matter where they are.
An SSD doesn’t care if a file’s data is stored together or spread out over a million different memory cells because it doesn’t have to travel physically. Access speed is almost instant no matter what. This one fact makes the main benefit of defragmentation, which is speeding up access to physical data, completely useless for an SSD.
Why It’s Not a Good Idea to Defragment an SSD
Defragmenting an SSD is not only useless, but it can also hurt the drive’s health. This is why:
SSD memory cells can only be written to a certain number of times. Every time you write or rewrite data to a cell, it gets a little bit weaker. SSDs made today last a very long time (we’re talking about years of heavy use), but they can only be written to a certain number of times.
Defragmentation requires a lot of reading and writing. The utility keeps reading data from one place and writing it to another until the drive is organized. This process wastes valuable write cycles on an SSD without improving performance. It’s like making your car drive around a parking lot thousands of times for no reason, which wears out the tires and engine.
In short, defragmenting an SSD doesn’t help it last longer.
The Apple File System (APFS) is Apple’s secret sauce.
There are other reasons why defragging is dead on the Mac besides the hardware. The software is also very important. The Apple File System (APFS) is what modern Macs use. It was first used in macOS High Sierra and was made just for flash and SSD storage.
APFS has features that stop fragmentation from happening in the first place. When you save a file, for instance, APFS knows how and where to put the data to get the best performance and longest life. It also does its own small, routine “housekeeping” tasks in the background on its own, so you don’t have to do anything.
HFS+ was the file system that older Macs used. Even on HFS+, macOS had features like Hot-File-Adaptive-Clustering that automatically moved fragmented files that were accessed often to a special “hot zone” on the hard drive where they would be stored together. This was basically automatic, on-the-fly defragmentation for the files that were most important.
For more than ten years, macOS has been smartly taking care of your files for you. The system has been designed so that a manual, full-drive defrag is no longer necessary.
So, should I ever defragment my Mac hard drive?
So, are there any rare cases where defragmentation might be a good idea? In one very specific case, the answer is a very qualified “maybe.”
Only think about defragmenting an external, mechanical Hard Disk Drive (HDD) that you use with your Mac.
Let’s say you have an older, big external hard drive that you use to store huge files like video editing projects or huge photo libraries. These drives are still mechanical, so they can break up like the old internal drives. If you notice that this external drive has gotten noticeably slower over the years, and you often write and delete large files on it, running a defragmentation utility only on that external HDD might make it faster.
To be perfectly clear:
- Internal SSD (in any modern Mac): Never defrag.
- Internal Fusion Drive (a mix of HDD and SSD): Don’t ever defragment. This is done automatically by macOS.
- Internal HDD (on a very old Mac, before 2012): Still mostly unnecessary because of macOS’s built-in optimizations, but it is possible. But you should put your effort into other optimizations instead.
- External SSD: Don’t ever defragment.
- External HDD: The only time it might help is if that drive is noticeably slowing down.
If you ever need to defrag an external hard drive, you will need to use third-party software because Apple does not include a defrag tool in macOS for the reasons we’ve already talked about. iDefrag and Drive Genius were two popular tools in the past, but you should always make sure that any utility you buy or use is compatible with your current version of macOS.
The “New” Defragmentation: Optimizing Your Mac in the 21st Century
What should you do if your Mac is running slowly and defragmenting doesn’t help? The good news is that there are a lot of safe, effective, and Apple-approved ways to keep your Mac running smoothly and quickly. You could say that these are like defragmentation in the modern world. Here are some useful tips you can use.
1. Take control of your storage with built-in tools
A full Mac is often a slow Mac. When your main Mac hard drive gets close to full, macOS has less space to store virtual memory (swap files) and temporary files. This makes things slow down a lot. Apple has a great built-in tool for this.
How to Use It:
- Click on the Apple menu in the upper left corner of your screen.
- Open System Settings > General > Storage.
- Give macOS a minute to figure out how much space you have left. A bar with colors will show you what’s taking up space.
- You’ll see a list of Recommendations below the bar. These are worth their weight in gold.
- Store in iCloud: This sends files, photos, and messages to iCloud, which frees up space on your local drive. This is one of the best tools.
- Optimize Storage: This feature deletes TV shows and movies you’ve already watched from your Mac.
- Automatically Empty Trash: This is a simple but effective way to make sure that deleted files don’t stay around.
- Review Documents: This will give you a list of big files, downloads, and apps that don’t work with your device. You can then choose to delete them.
Tip: Check your Storage recommendations every few months to make sure they are still useful. Getting back even 10–20 GB of space can make a big difference in how well your computer works.
2. Use Disk Utility to run First Aid.
Fragmentation isn’t a problem, but directory errors and permission problems can be. This is like making sure the library’s card catalog is correct, even if the books are perfectly arranged on the shelves. You can use Disk Utility to do this. Its First Aid feature can find and fix many problems with the file system.
How to Use It:
Go to Finder > Applications > Utilities.
Start up Disk Utility.
Choose your main Mac hard drive (usually called “Macintosh HD”) from the sidebar.
In the toolbar, click the First Aid button.
To start the process, click “Run.”
Tip: Do First Aid every few months as a precaution, or whenever you notice strange behavior, like apps crashing or files not opening correctly. It’s a safe and strong first step in fixing things.
3. Update your software regularly
This sounds easy, but it’s very important. Every time you update macOS, you get more than just new features. You also get performance improvements, security patches, and bug fixes that can fix problems that are making your Mac slow down. The same is true for your apps.
**How to Do It:
For macOS, click on System Settings > General > Software Update.
For apps, open the “App Store,” click on your profile picture, and then click “Update All.”
Helpful Hint: Turn on automatic updates for your apps and macOS. You don’t have to think about it this way; you’re always using the most secure and optimized versions.
4. Control Your Login Items
Does it take a long time for your Mac to start up? It’s probably because too many programs are trying to start up as soon as you log in. From the start, each one takes a piece of your Mac’s memory and processing power.
How to Take Care of Them:
- Click on System Settings > General > Login Items.
- You will see two parts:
- Open at Login: These are apps that start up completely when you log in. Click the minus (“-“) button to remove any that you don’t need right away.
- Allow in the Background: These are utilities and update programs that run in the background without opening a full window. Take a close look at this list. If you see something from an app you don’t use anymore, turn it off.
Helpful Hint: Don’t hold back here. When you log in, you only need the apps that you use every time you start your Mac. It’s quicker to start them up by hand when you need them for everything else.
5. Clean Up Caches and Temporary Files (Be Careful!)
Your Mac and its apps make temporary “cache” files to make things go faster. For instance, a web browser saves images from websites so that it doesn’t have to download them again every time you visit. While usually helpful, these caches can sometimes become bloated or corrupted, leading to slowdowns.
There are a lot of third-party “Mac cleaner” apps out there, but you need to be careful because a lot of them are useless or even harmful (some are almost malware). A manual method that is safe is often the best.
A Safe Way to Clear User Cache:
Open Finder.
At the top of the screen, click the Go menu and hold down the Option key. A new option called “Library” will show up. Push it.
Open the Library folder that opens and look for the Caches folder.
There will be a lot of folders, and each one will be named after an app (for example, com.apple.Safari).
You can choose all the folders in the Caches folder and drag them to the Trash by pressing “Command-A.”
Important: Only delete the files inside the Caches folder, not the folder itself.
Take out the trash and restart your Mac. When your Mac needs to, it will make new, clean caches.
Useful Tip: This is more of an advanced step. Do this only if you know how to find your way around the Library folder and if other ways to speed up your computer haven’t worked.
Advanced Troubleshooting for When Your Mac Still Feels Slow
It’s time to look a little deeper if you’ve tried all the usual maintenance tips and your Mac is still slow. It might not be a general maintenance issue, but a specific problem child.
Look in Activity Monitor for Programs That Use a Lot of Resources
The Mac version of a car’s diagnostic computer is called “Activity Monitor.” It shows you exactly what is using your Mac’s CPU, memory, energy, disk, and network in real time.
Start by opening Finder > Applications > Utilities > Activity Monitor.
To sort processes by how much processing power they’re using, click on the CPU tab and then the % CPU column.
Check for any process that is consistently using a lot of CPU power, like more than 80%. A runaway process could be an app or background task that isn’t working right. You can choose it and then click the “X” button at the top to stop it.
Do the same thing for the Memory tab. If an app is using a lot of RAM, it could be making your whole system run more slowly.
Helpful Hint: Put Activity Monitor in your Dock. Open your Mac the next time its fans start to spin or everything stops working. It will often lead you right to the person who did it.
Think about getting new hardware
For older Macs, especially those with a mechanical Mac hard drive or not enough RAM, the biggest performance boost won’t come from changing the software. It will come from upgrading the hardware.
Upgrade to an SSD: If you have an older iMac or MacBook Pro with an HDD, the best thing you can do to make it better is to upgrade it to an SSD. It will make the Mac seem like a brand-new computer.
Add More RAM: If you often have a lot of apps and browser tabs open at the same time and Activity Monitor shows high “Memory Pressure,” adding more RAM can make a big difference in how well your computer can handle multiple tasks at once.
This takes more technical know-how (or a trip to the repair shop), but it’s often a better way to fix old hardware than spending hours on software fixes.
The Bottom Line: Should You Defrag or Not?
Let’s go back to the question we asked at first. How do you defragment a Mac’s hard drive?
For more than 99% of Mac users, the answer is simple: You don’t.
The architecture of modern Macs, which use Solid-State Drives and the smart Apple File System, has made manual defragmentation an outdated and possibly dangerous practice. Your Mac is already working in the background to make itself better without you having to do anything.
Instead of looking for a fix that works with technology from 20 years ago, focus on the upkeep that really matters for a modern Mac:
- Don’t let your storage drive get full.
- **Run Disk Utility’s First Aid every so often.
- **Make sure your OS and apps are up to date.
- **Take care of your Login Items.
- **Use Activity Monitor to find processes that use a lot of resources.
If you follow these simple, useful steps, your Mac will run as smoothly and quickly as it did when you first got it. So the next time someone tells you to defrag your Mac, you can tell them with confidence that that’s an idea that should stay in the past, along with dial-up modems and floppy disks.
Source Links:
- Apple Support: How to free up storage space on your Mac
- Apple Support: About the Apple File System
- How-To Geek: Do I Need to Defrag My Mac?
https://bigezwehotv.rw/trends/